> ## Documentation Index
> Fetch the complete documentation index at: https://leylandscompany.leylnd.me/llms.txt
> Use this file to discover all available pages before exploring further.
# Vercel Marketplace
> Set up the Vercel Marketplace integration in Autumn
Autumn lets you add your product to [Vercel's Marketplace](https://vercel.com/marketplace) without any additional code. This guide walks through connecting the Autumn partner API and webhooks to Vercel, and setting up Stripe's custom payment method for accurate billing.
This is currently in beta. Reach out on [Discord](https://discord.gg/STqxY92zuS) or email [hey@useautumn.com](mailto:hey@useautumn.com) to get access.
## Prerequisites
* An Autumn account with a connected Stripe account
* A Vercel integration entry in the [Vercel Integration Console](https://vercel.com/dashboard/integrations)
## Setup
### Open the Integration Console
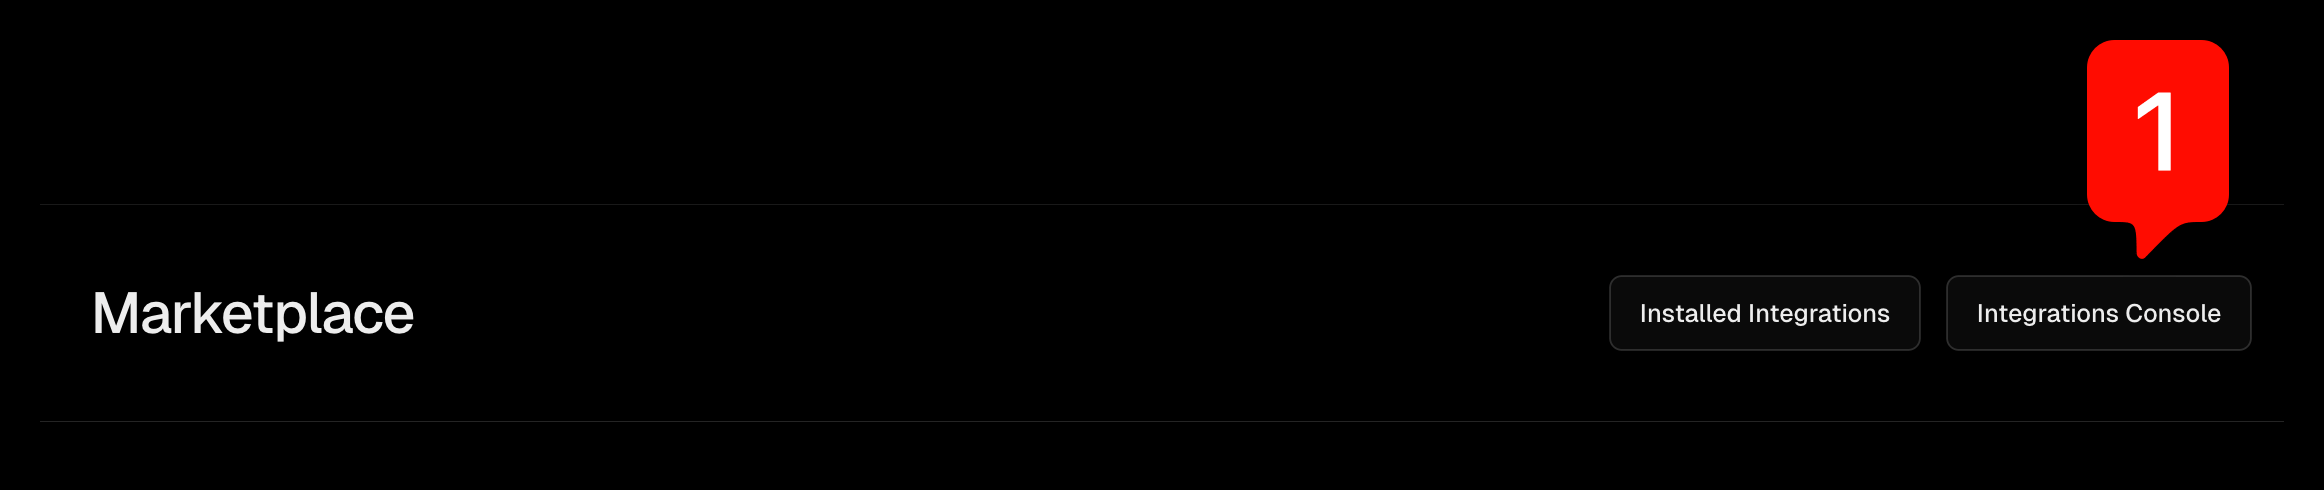
Navigate to the Vercel dashboard, then go to **Integrations → Browse Marketplace → Integration Console**.
 ### Copy your Vercel credentials
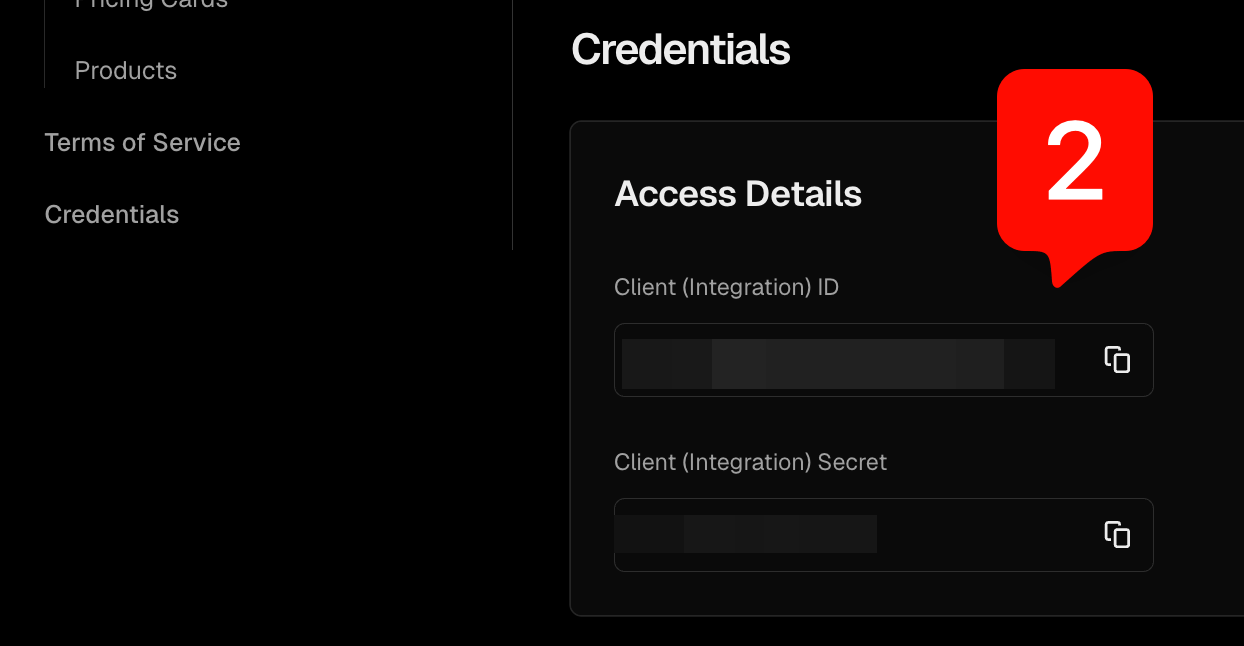
Scroll to the bottom of the Integration Console page to find your **Client (Integration) ID** and **Client (Integration) Secret**. You'll need both of these for the Autumn dashboard.
### Copy your Vercel credentials
Scroll to the bottom of the Integration Console page to find your **Client (Integration) ID** and **Client (Integration) Secret**. You'll need both of these for the Autumn dashboard.
 ### Copy the Base URL from Autumn
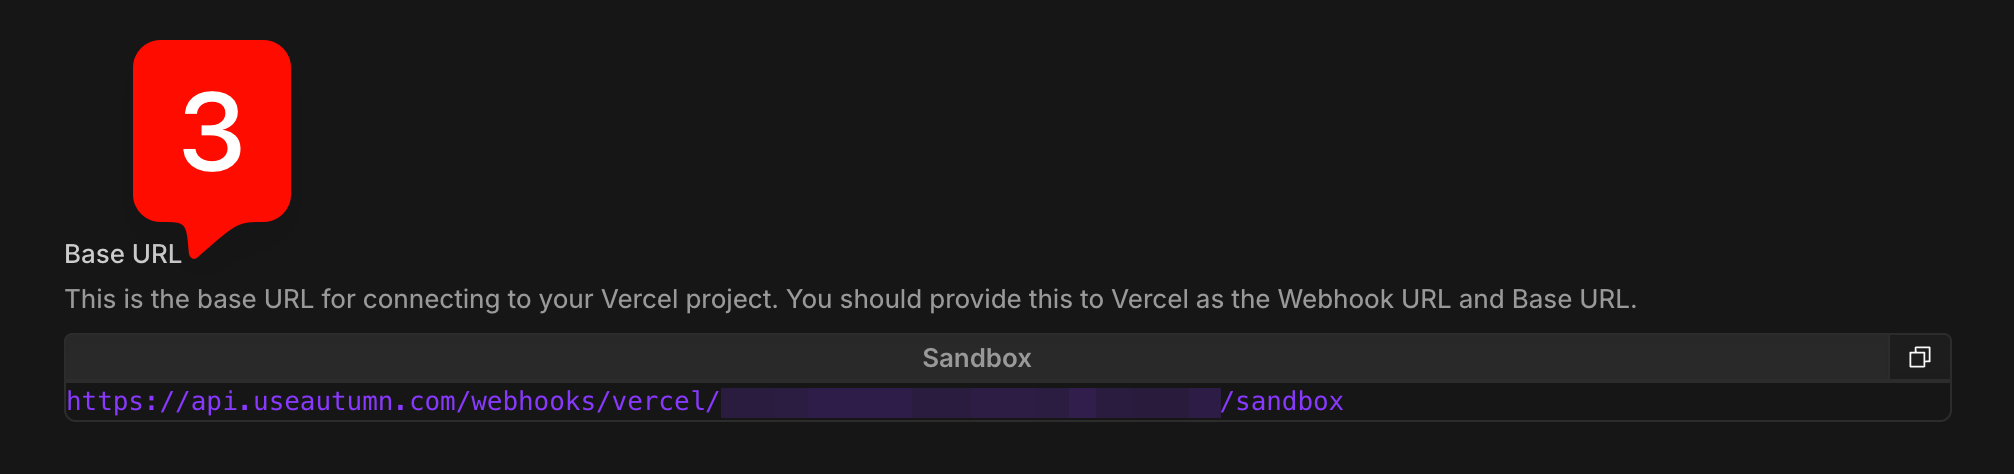
In the Autumn dashboard, open **Developer → Vercel**. Enter the Client ID and Client Secret from the previous step, then copy the **Base URL** that Autumn generates for you.
### Copy the Base URL from Autumn
In the Autumn dashboard, open **Developer → Vercel**. Enter the Client ID and Client Secret from the previous step, then copy the **Base URL** that Autumn generates for you.
 ### Set the Webhook URL in Vercel
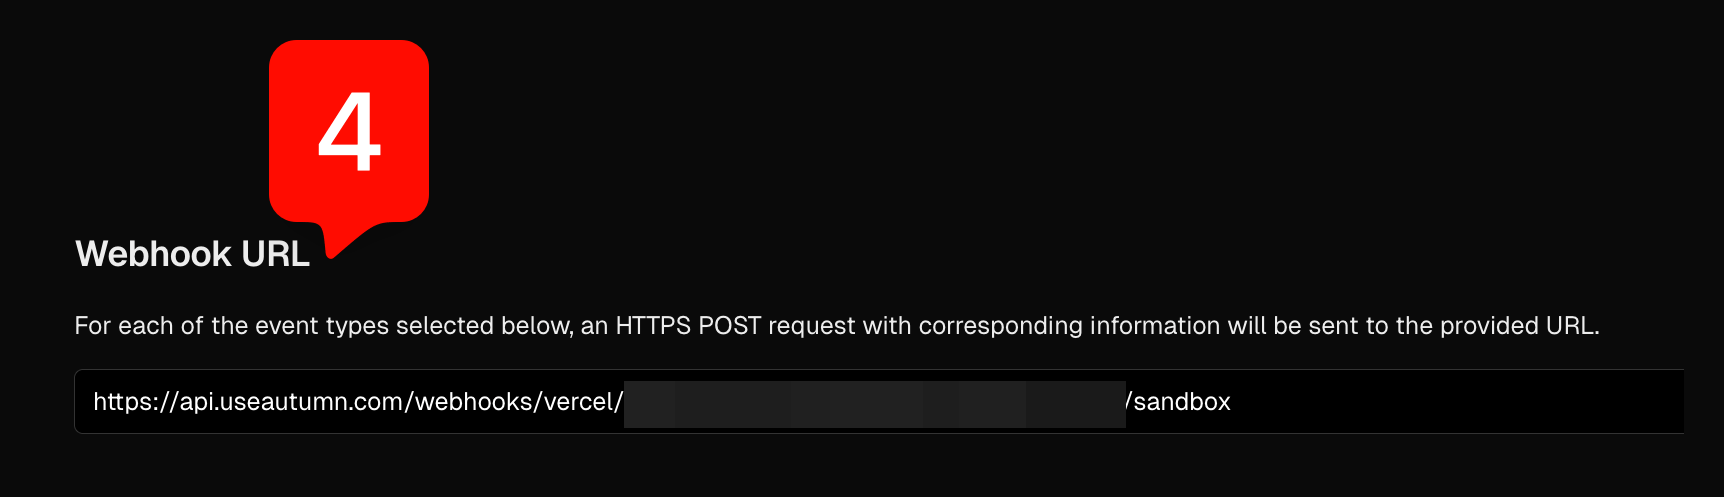
Back in the Vercel Integration Console, paste the Autumn Base URL into the **External Integration Settings → Webhook URL** field.
### Set the Webhook URL in Vercel
Back in the Vercel Integration Console, paste the Autumn Base URL into the **External Integration Settings → Webhook URL** field.
 ### Set the Marketplace Base URL in Vercel
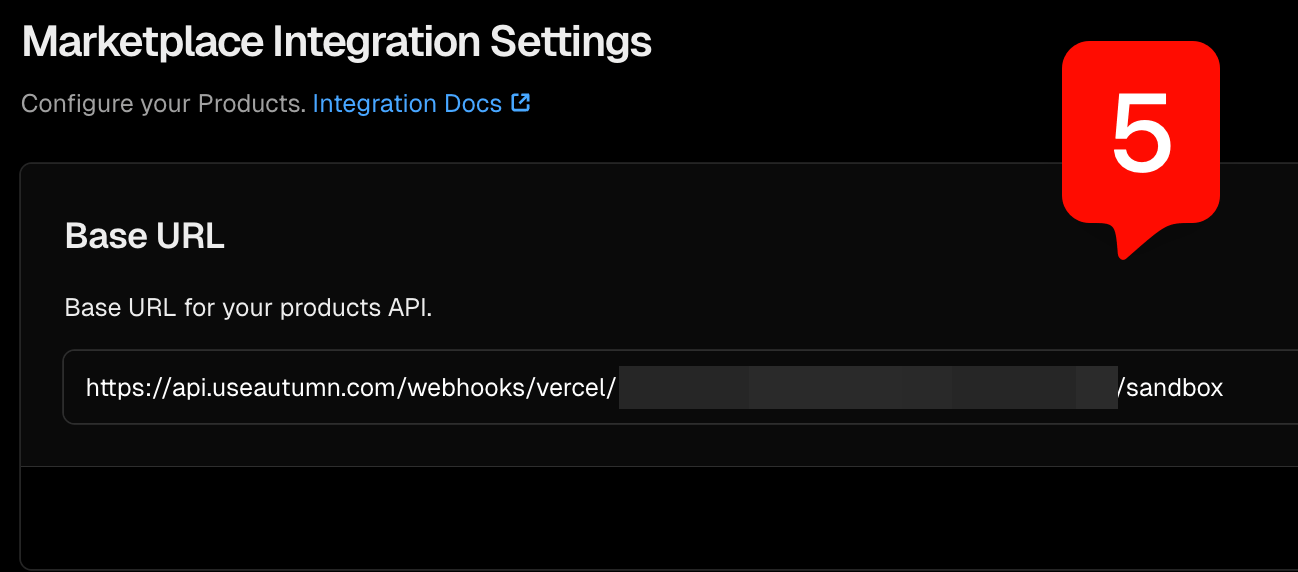
Paste the same Autumn Base URL into **Marketplace Integration Settings → Base URL**.
### Set the Marketplace Base URL in Vercel
Paste the same Autumn Base URL into **Marketplace Integration Settings → Base URL**.
 ### Create a Stripe custom payment method
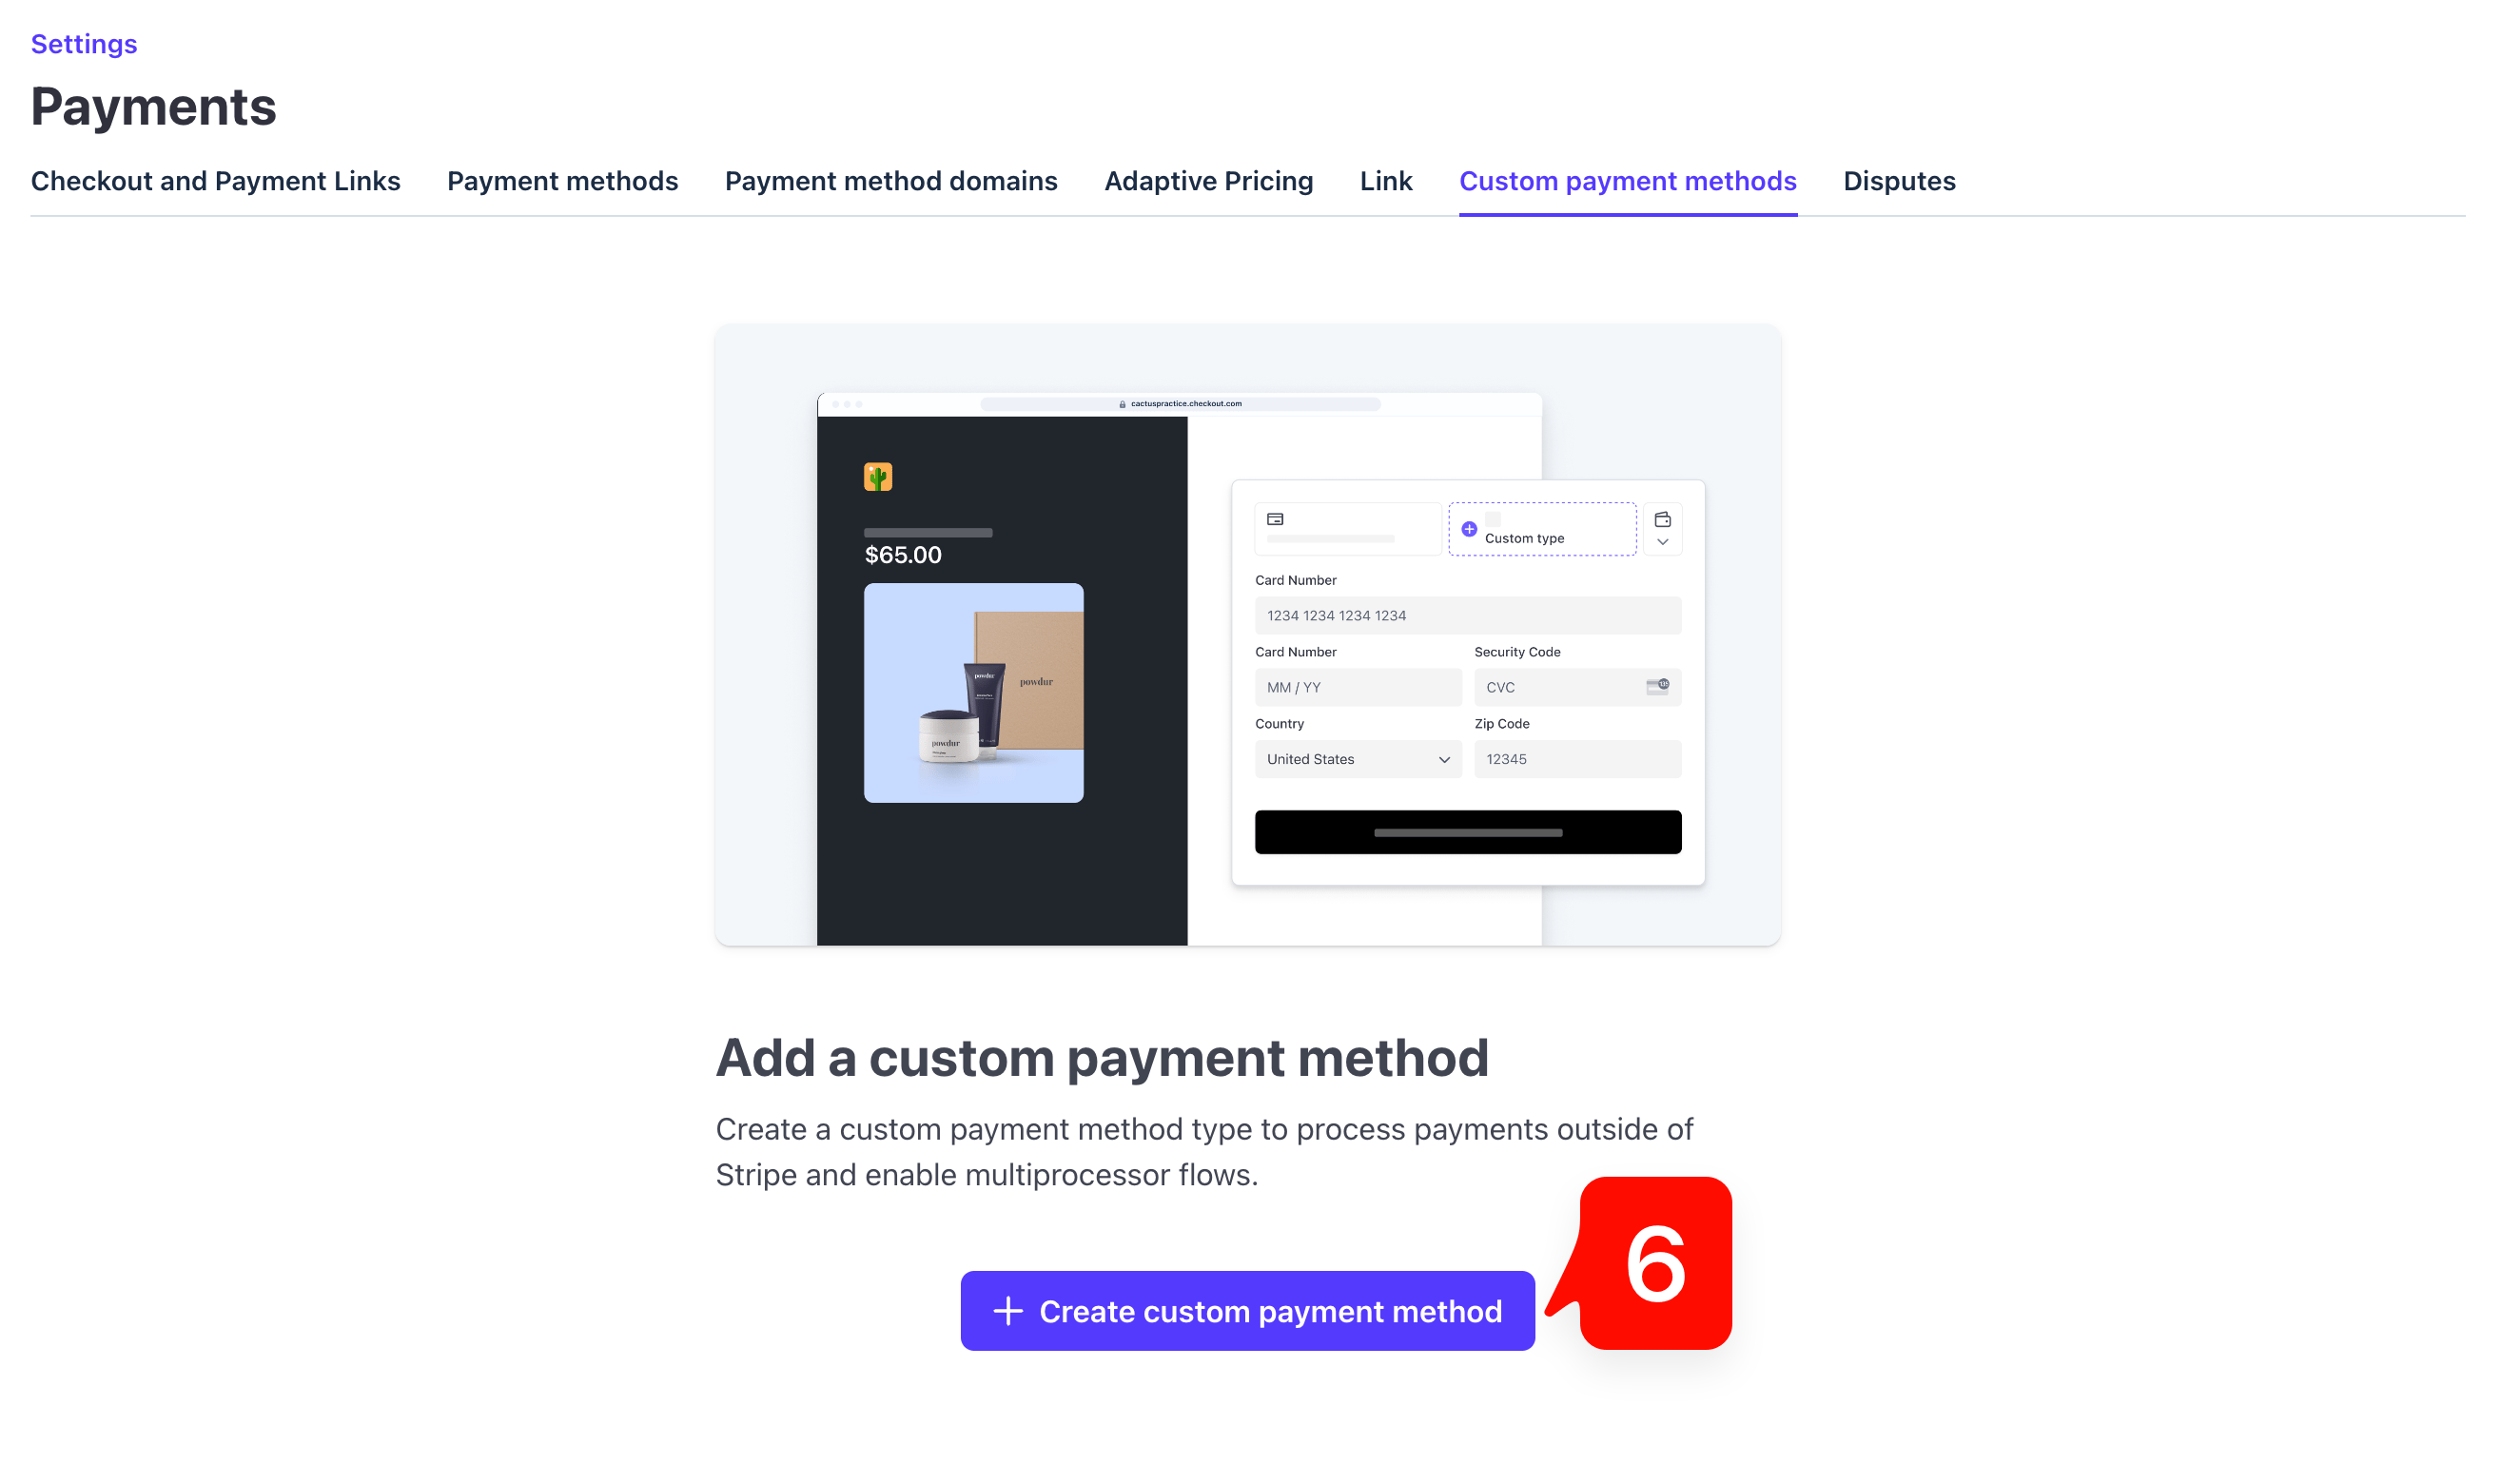
Autumn uses Stripe's billing clock for accurate billing cycles and invoice reporting via the **Custom Payment Methods** system. In the Stripe dashboard, go to **Settings → Payments → Custom payment methods**, then click **Create a custom payment method**.
### Create a Stripe custom payment method
Autumn uses Stripe's billing clock for accurate billing cycles and invoice reporting via the **Custom Payment Methods** system. In the Stripe dashboard, go to **Settings → Payments → Custom payment methods**, then click **Create a custom payment method**.
 ### Provide a custom name and icon
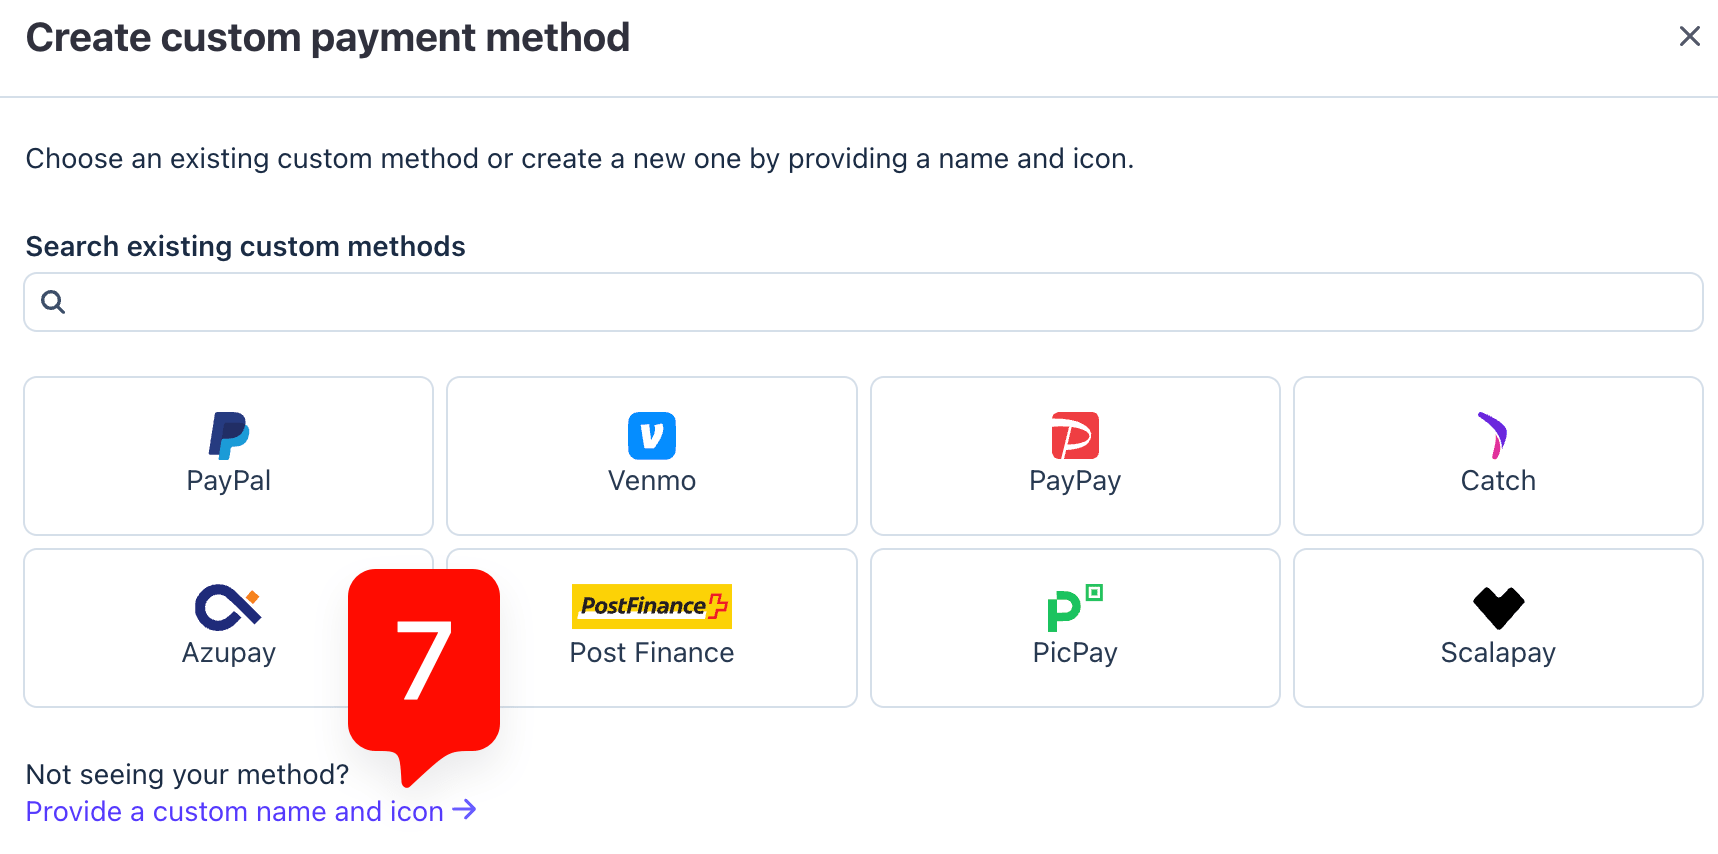
Select **Provide a custom name and icon** at the bottom of the payment method selection dialog.
### Provide a custom name and icon
Select **Provide a custom name and icon** at the bottom of the payment method selection dialog.
 ### Name the payment method
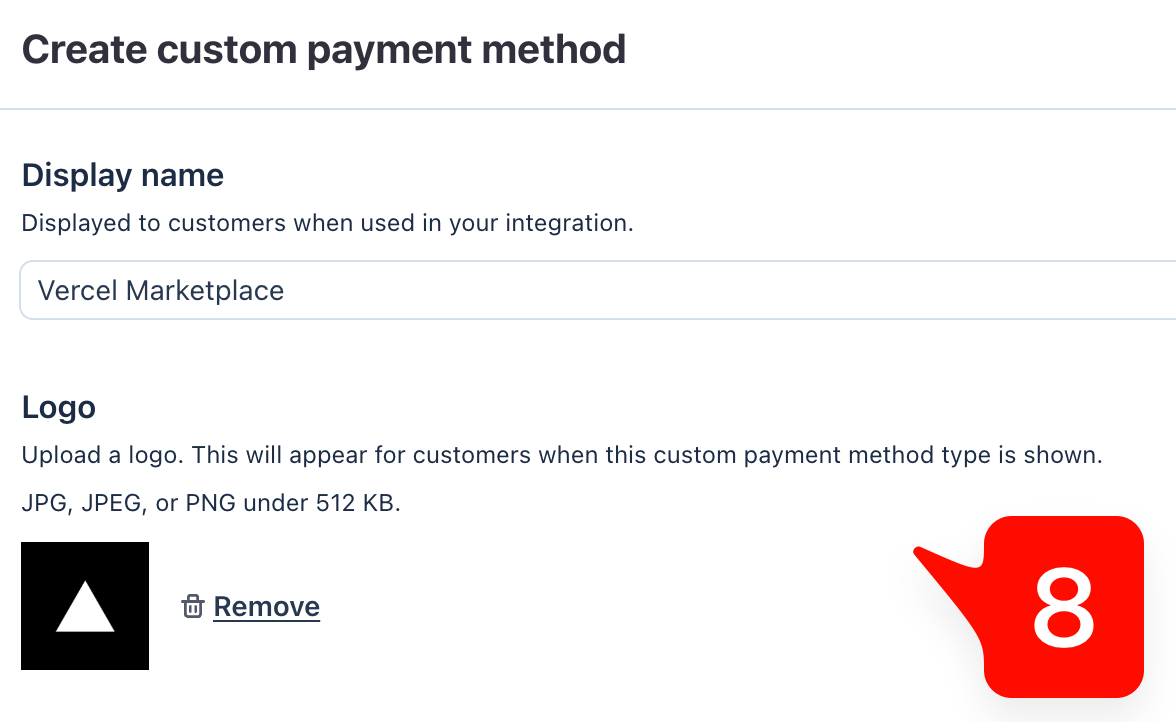
Enter **Vercel Marketplace** as the display name and upload the Vercel logo.
### Name the payment method
Enter **Vercel Marketplace** as the display name and upload the Vercel logo.
 ### Copy the custom payment method ID
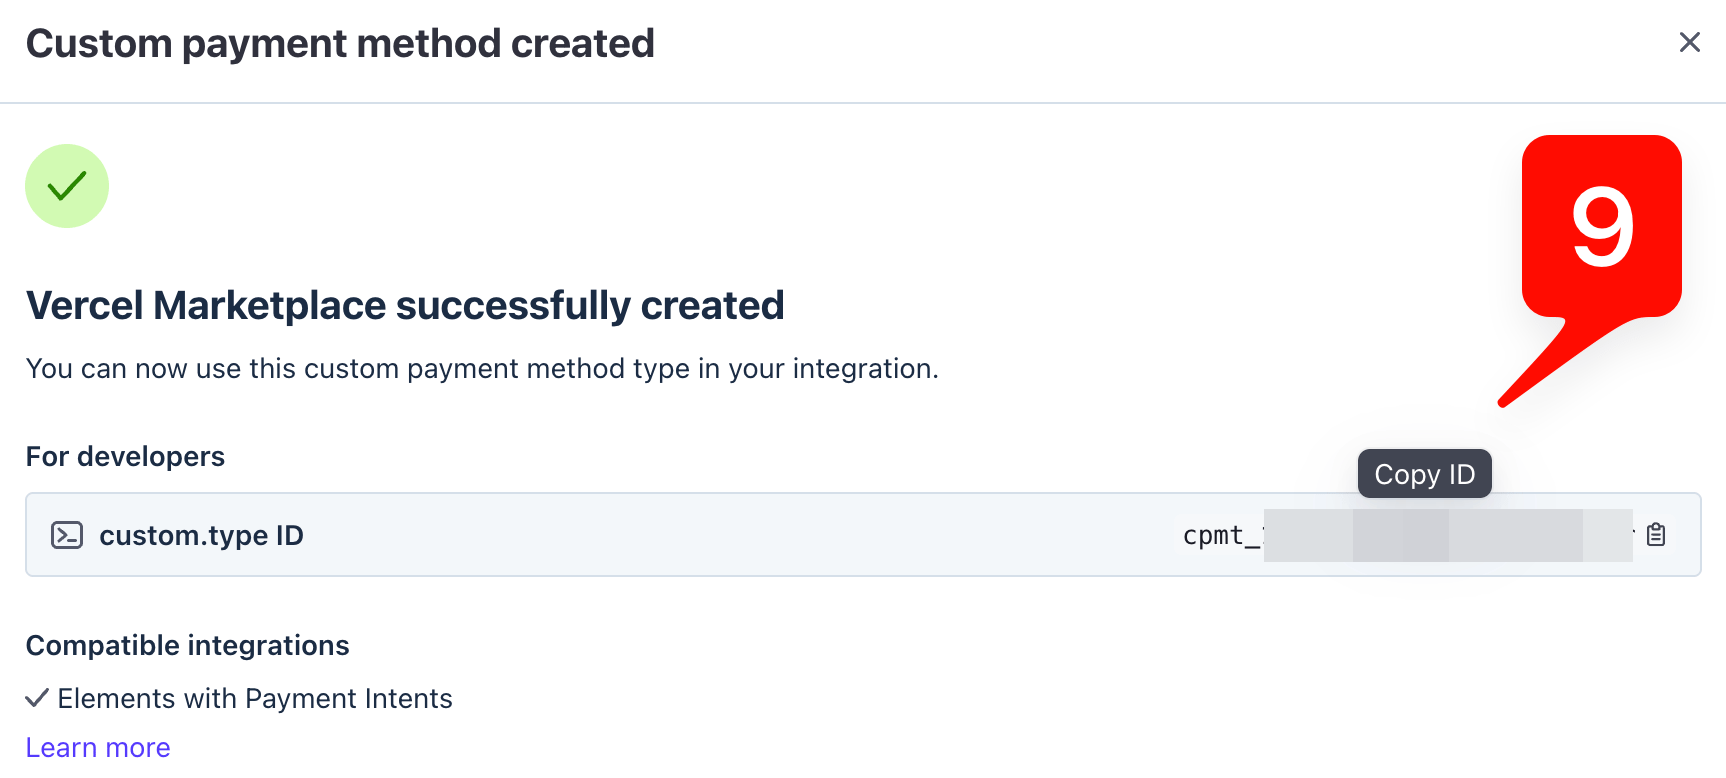
After creating the payment method, Stripe will display a `custom.type ID` (starting with `cpmt_`). Copy this ID and paste it into the **Custom Payment Method ID** field in the Autumn dashboard.
### Copy the custom payment method ID
After creating the payment method, Stripe will display a `custom.type ID` (starting with `cpmt_`). Copy this ID and paste it into the **Custom Payment Method ID** field in the Autumn dashboard.
 ### Configure webhook events
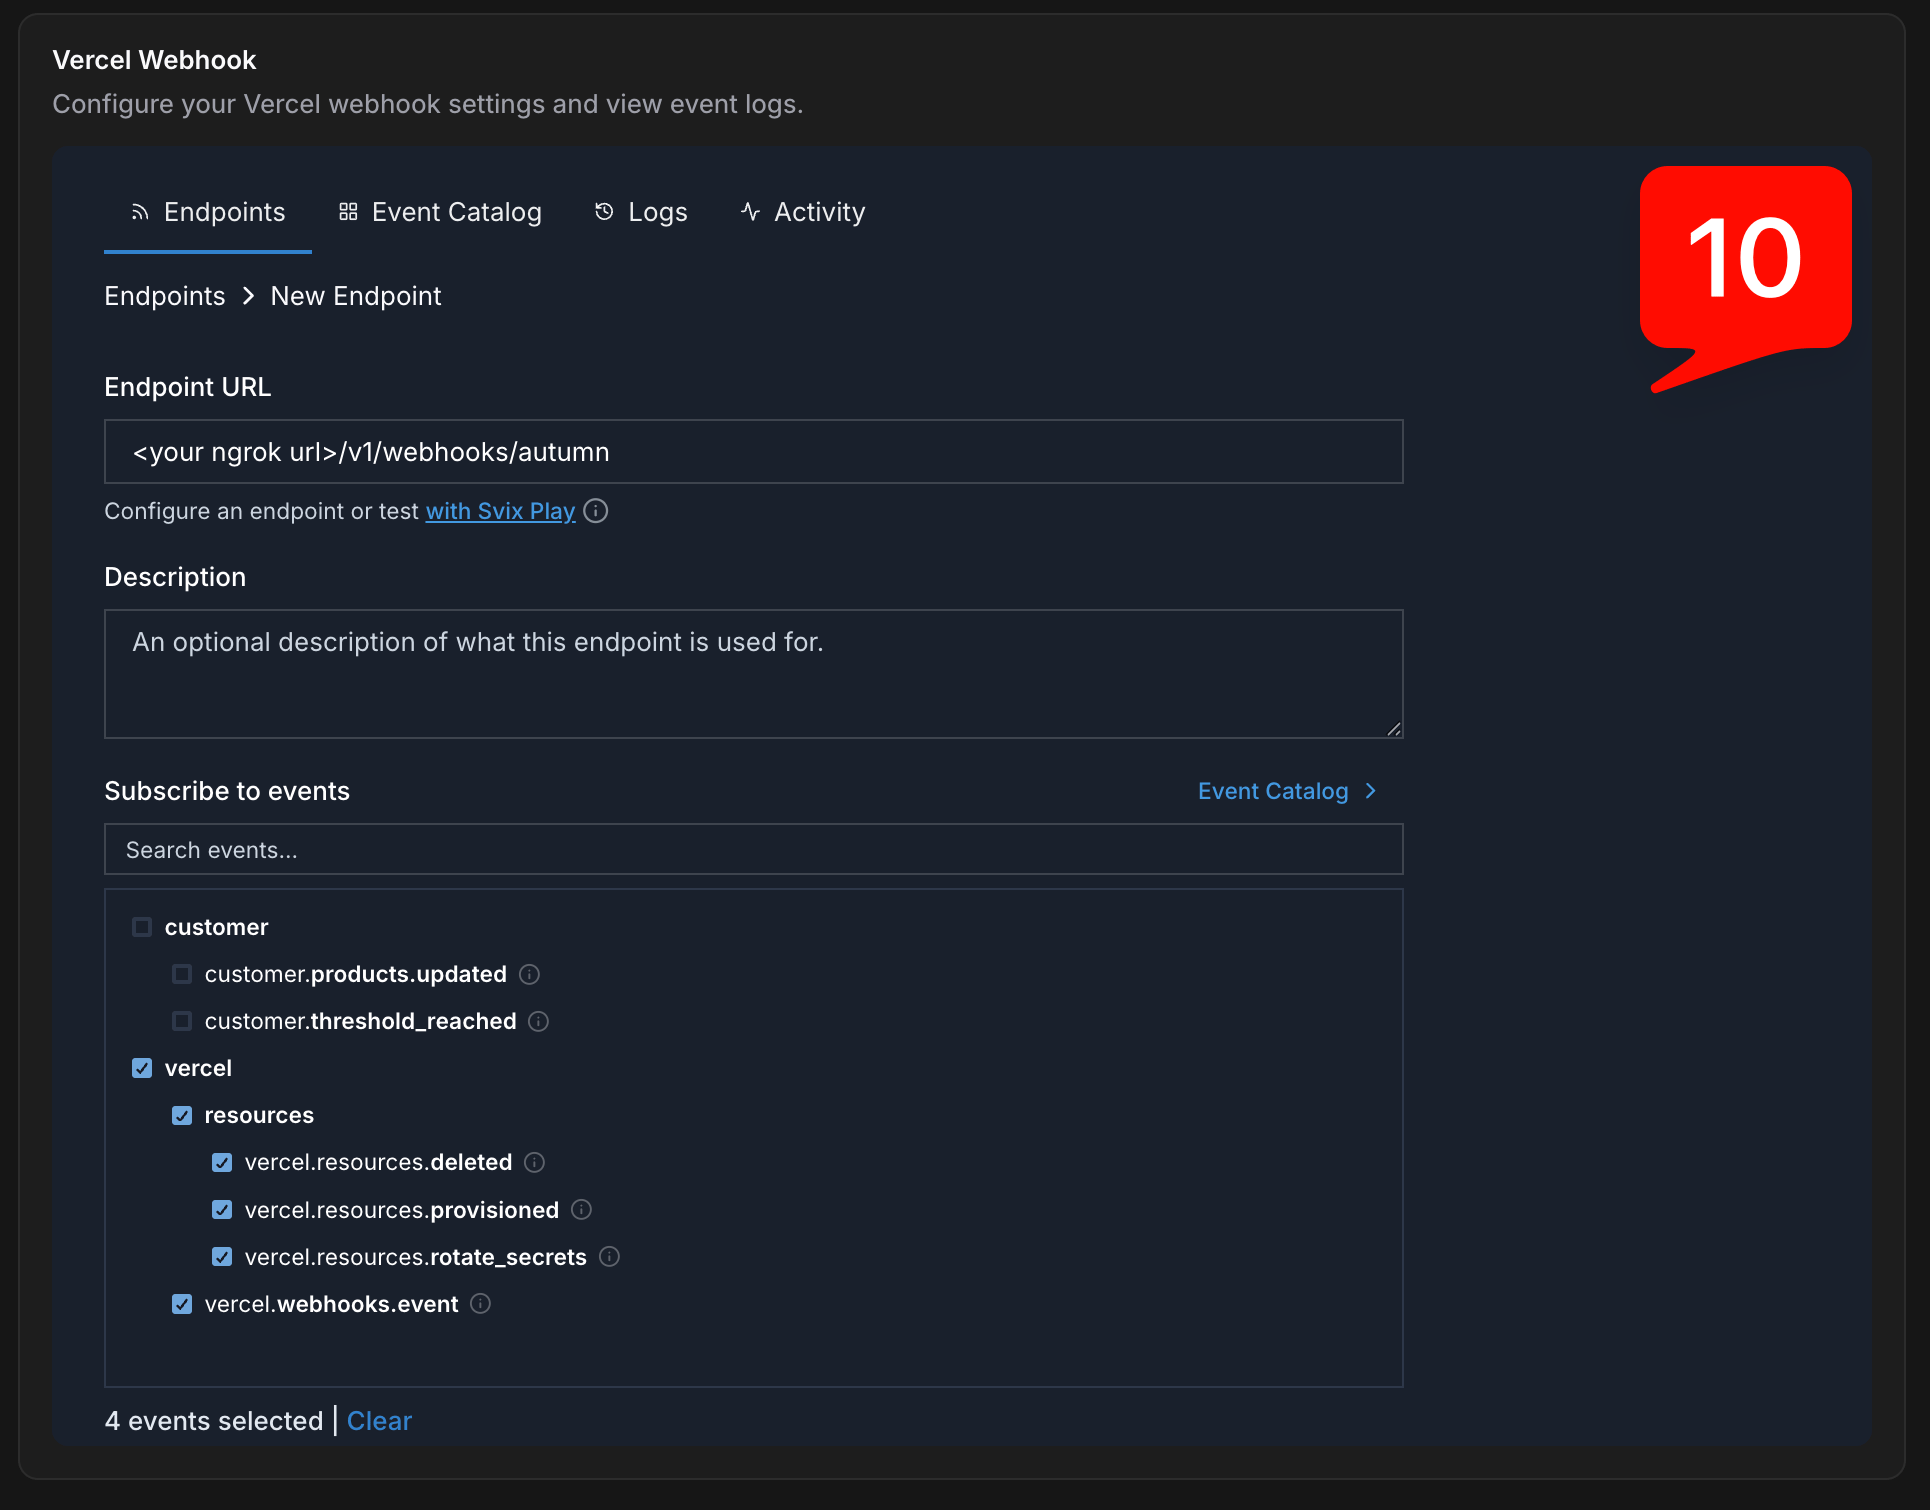
Finally, set up the webhook endpoint for events that Autumn sends to your application. In the Autumn dashboard under **Developer → Vercel**, use the Svix webhook iframe to create a new endpoint. Set your endpoint URL and subscribe to all **Vercel** events. You can ignore the standalone "Webhook URL" setting and leave it empty — the Svix iframe handles this instead.
### Configure webhook events
Finally, set up the webhook endpoint for events that Autumn sends to your application. In the Autumn dashboard under **Developer → Vercel**, use the Svix webhook iframe to create a new endpoint. Set your endpoint URL and subscribe to all **Vercel** events. You can ignore the standalone "Webhook URL" setting and leave it empty — the Svix iframe handles this instead.
 ## Validation
Once everything is configured, trigger a test event flow in Vercel to confirm end-to-end delivery. Verify that:
* Vercel receives callback requests for key lifecycle events
* Autumn logs the incoming payload and processes it correctly
* Your application receives the forwarded webhook events
If events aren't being delivered, double-check that the Base URL is identical in both the Webhook URL and Marketplace Base URL fields in Vercel.
## Validation
Once everything is configured, trigger a test event flow in Vercel to confirm end-to-end delivery. Verify that:
* Vercel receives callback requests for key lifecycle events
* Autumn logs the incoming payload and processes it correctly
* Your application receives the forwarded webhook events
If events aren't being delivered, double-check that the Base URL is identical in both the Webhook URL and Marketplace Base URL fields in Vercel.